
Thank you so much for being here. It means the world to me that you’ve taken a moment out of your day to explore this radiant little recipe. If you’re someone who finds joy in the small wonders—like catching a glimpse of the northern lights or unwrapping a shiny hard candy—then this Aurora Candy recipe is going to capture your imagination. It’s sweet, sparkling, and glows with the kind of playful magic that brings out everyone’s inner kid.
This isn’t just candy—it’s a whole vibe. And guess what? You don’t need a candy shop or complicated tools to make it. This recipe transforms just a few everyday ingredients into something visually stunning and joyfully nostalgic. Perfect for celebrations, gifting, or simply enjoying on your own, these homemade hard candies are inspired by the mesmerizing hues of the aurora borealis. And yes—they really do shine and shimmer just like the real thing!
What Is Aurora Candy?
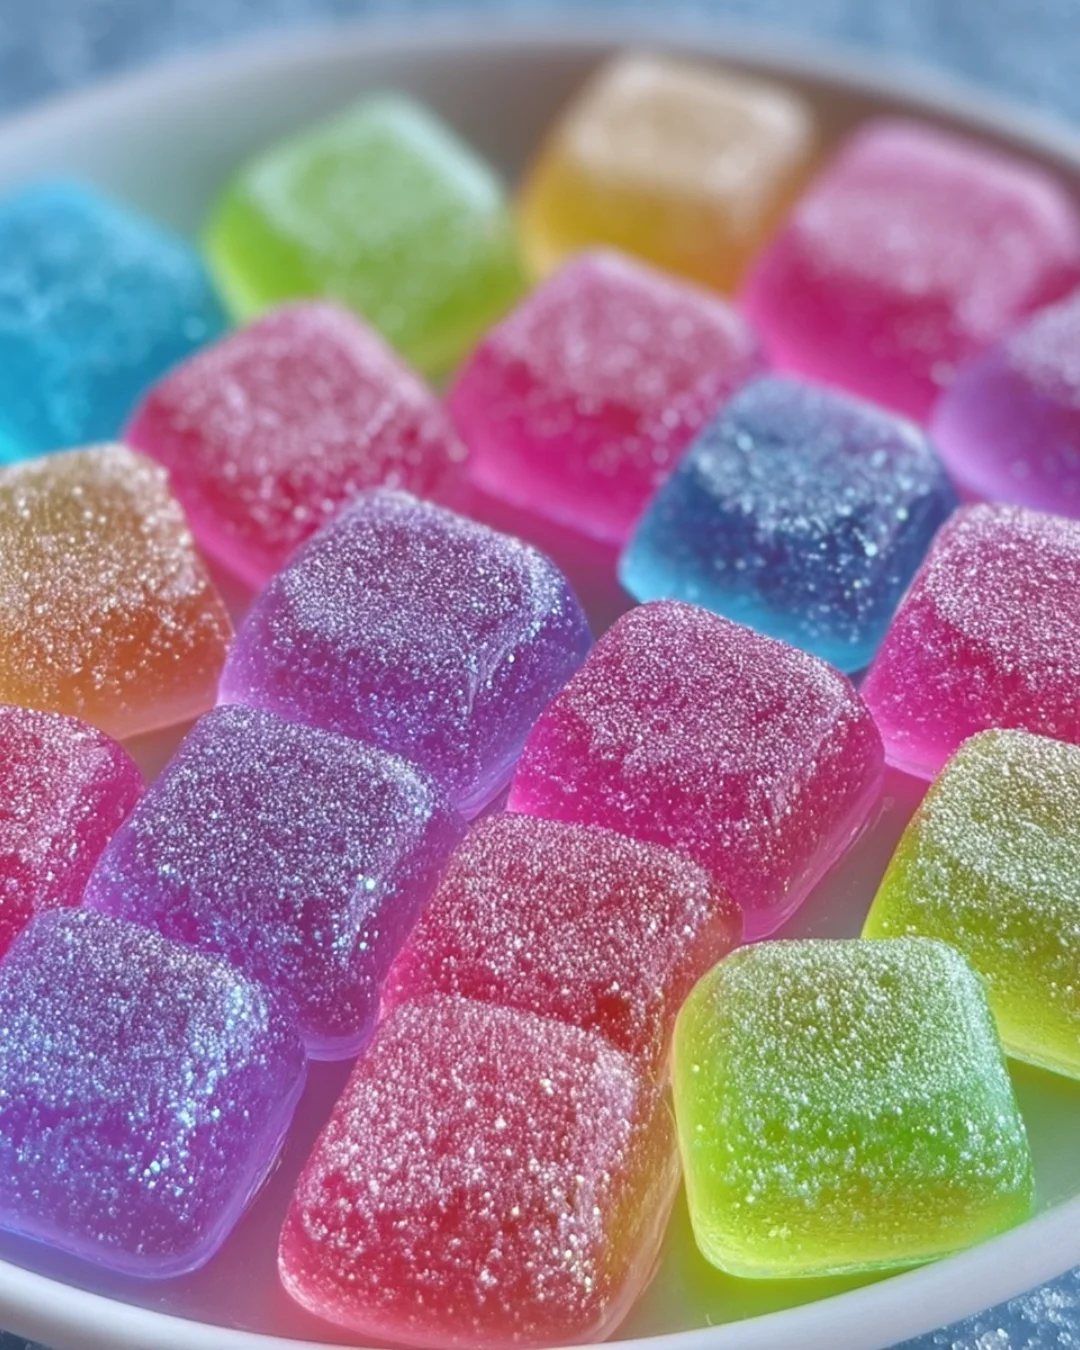
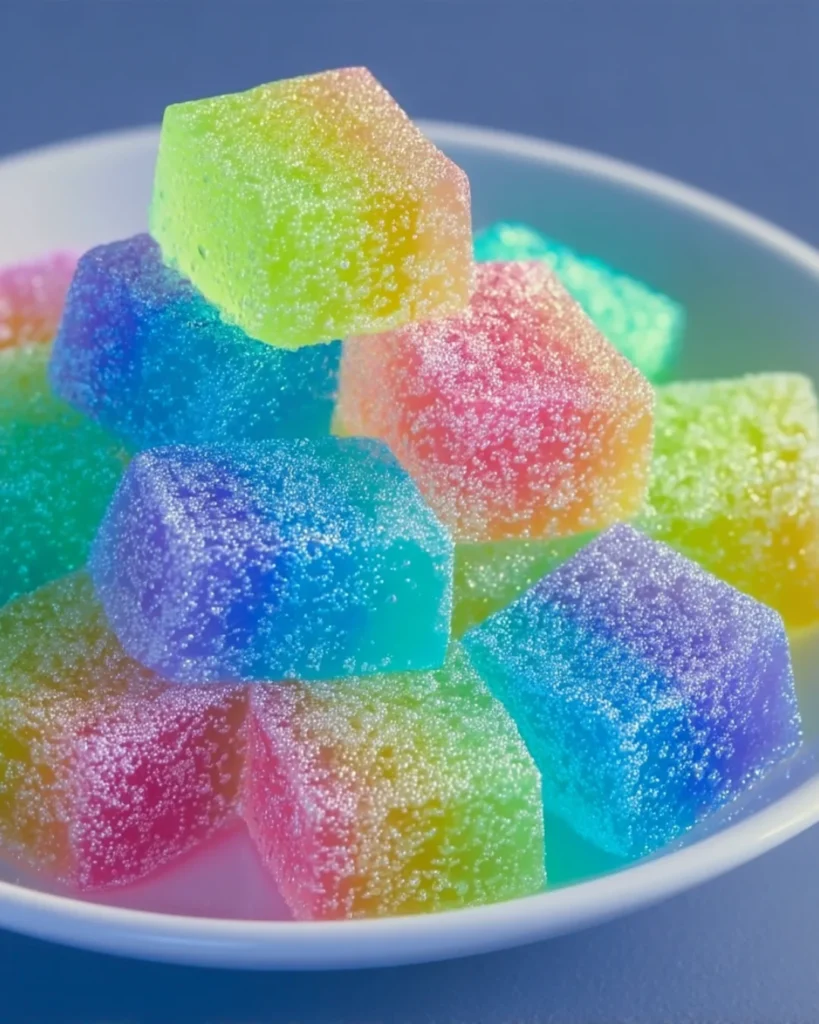
Aurora Candy is a homemade hard candy that mimics the look of the northern lights. Picture this: a translucent, glossy finish infused with swirls of vibrant neon color—blues, purples, pinks, greens—each piece catching the light like a little shard of glass pulled straight from the sky. These candies are not only beautiful to look at, but they also taste amazing with optional flavorings like raspberry, lime, or even floral hints like lavender.
The method is simple but precise. By cooking sugar, corn syrup, and water to the hard crack stage (that’s 300°F), you create a stable candy base that cools to a brittle, glassy finish. Add in food coloring for those radiant hues, a few drops of flavor for extra flair, and toss them in sanding sugar or citric acid to enhance the look and taste. It’s art, it’s science, and it’s downright delicious.
Why You’ll Love This Recipe
There are so many reasons to fall in love with Aurora Candy:
- It’s a showstopper. These candies look absolutely stunning, with a crystalline shine and swirled rainbow colors that make them almost too beautiful to eat.
- It’s a creative escape. Making this candy feels like a crafting project—fun, hands-on, and incredibly satisfying.
- It’s customizable. From color to shape to flavor, every batch can be uniquely yours.
- It’s surprisingly simple. As long as you have a candy thermometer and a bit of patience, the process is easy to follow.
- It’s great for all occasions. Whether you’re making party favors, holiday treats, or sweet gifts, this candy fits the bill.
What Does Aurora Candy Taste Like?
At its heart, this is a classic hard candy—similar in texture to lollipops or old-school glass candies—but the taste can be customized to your liking. The base flavor is sweet and pure, but you can infuse it with extracts like raspberry, lime, orange, or even something a little more exotic like elderflower or peppermint. The coating of sanding sugar or citric acid adds an extra dimension—either enhancing the sweetness or giving it a zippy, tangy edge.
The experience is one of contrast and harmony: smooth yet crunchy, sweet yet sharp, simple yet sophisticated. The flavor possibilities are endless, which makes this a fantastic base recipe for experimentation.
The Benefits of Making Your Own Candy
When you make your own candy, you’re not just controlling the ingredients—you’re participating in a time-honored kitchen tradition that blends creativity, chemistry, and care. Here are a few benefits:
- Ingredient control: Choose natural flavors and colors if you like, or go full neon with gel dyes. The choice is yours.
- Cost-effective: A whole batch of homemade candy costs far less than a store-bought equivalent.
- Educational for kids: Making candy is a fun, edible way to teach kids about temperature, states of matter, and how sugar behaves.
- Gifting potential: These candies package beautifully in small bags or jars for thoughtful DIY gifts.
Ingredients
- 1 cup granulated sugar
- ½ cup light corn syrup
- ¼ cup water
- Food coloring (gel or neon recommended for best color payoff)
- Flavoring extract (optional—raspberry, citrus, mint, etc.)
- Citric acid or sanding sugar for coating
Tools You’ll Need
- Heavy-bottomed saucepan (2-quart size works well)
- Candy thermometer
- Silicone candy molds or parchment-lined baking tray
- Nonstick cooking spray
- Silicone spatula or wooden spoon
- Small droppers or pipettes for precision pouring (optional)
- Airtight container for storage
Ingredient Substitutions and Additions
If you’re missing some ingredients or want to switch things up, here are some options:
- Corn syrup substitute: Golden syrup or glucose syrup will work in a pinch, although the final candy may be slightly cloudier.
- Coloring options: Gel-based food coloring gives the best, most vivid results. Natural colorings work too, but the colors will be softer.
- Flavoring extracts: Try combining flavors—like lemon-lime, strawberry-vanilla, or mint-lavender—for something uniquely yours.
- Decoration: A light dusting of edible glitter or shimmer powder can turn each candy into a glowing gem.
Step-by-Step Instructions
Step 1: Prepare Your Molds
Spray your silicone molds lightly with nonstick spray, or line a baking sheet with parchment paper and oil it. Set aside.
Step 2: Combine Sugar, Corn Syrup, and Water
In a medium saucepan, combine the sugar, corn syrup, and water. Stir over medium heat just until the sugar has dissolved and the mixture becomes clear.
Step 3: Heat Without Stirring
Once dissolved, stop stirring and attach a candy thermometer to the side of the pan. Increase the heat slightly and allow the mixture to boil until it reaches 300°F, which is the hard crack stage. This usually takes 8 to 10 minutes.
Step 4: Add Color and Flavor
When the temperature hits 300°F, immediately remove the pan from heat. Add your food coloring and flavor extract. Be quick—this part is time-sensitive. Stir just until incorporated, and avoid over-mixing to keep those beautiful swirls of color intact.
Step 5: Pour Into Molds
Carefully pour the hot candy into your molds or onto the prepared tray. You can use droppers to create more precise shapes or layering of colors if you’re going for that aurora-inspired effect.
Step 6: Let Cool and Harden
Allow the candy to cool completely at room temperature—this usually takes 30 to 60 minutes depending on the size and shape of the pieces.
Step 7: Add Final Touches
Once hardened, pop the candies out of the molds and toss them in sanding sugar or citric acid for that frosted, cosmic look. Store in an airtight container until ready to enjoy.
What to Serve with Aurora Candy
Aurora Candy is delightful on its own, but it also plays beautifully alongside themed drinks and party treats. Here are some favorite pairings to create a whole magical spread:
- Cotton Candy Mocktails: Fluffy, pastel, and perfect with the sparkle of Aurora Candy on the rim.
- Loki Mocktail: With its deep green hue and mischief-inspired flavors, this mocktail creates a bold contrast to the candy’s rainbow shimmer.
- Frozen Lake Mocktail: Sparkling Winter Delight: The icy blues and gentle bubbles of this mocktail complement the cool tones and crackle of the candy perfectly.
Together, these recipes create a stunning celestial dessert table that’s ideal for parties, fantasy-themed events, or cozy nights in.
Tips for Success
- Always use a thermometer. Candy making is all about precision, and guessing the temperature can lead to chewy or burnt results.
- Avoid stirring once the mixture begins to boil. Stirring at this stage encourages crystallization, which makes the candy cloudy.
- Work quickly once it’s off the heat. Sugar hardens fast, so have all your colors, molds, and tools ready before you start.
- Keep humidity low. Moisture in the air can cause your candy to absorb water and become sticky. Make these on a dry day if possible.
- Be cautious. Hot sugar is extremely dangerous. Keep little hands away and use heat-proof gloves if you’re nervous about pouring.
Storage Instructions
Once the candy is completely cool, store it in an airtight container at room temperature. Keep it away from humidity and direct sunlight to preserve clarity and texture. Properly stored, the candies will keep for two to three weeks.
If you’re gifting, place each piece in a mini candy wrapper or cellophane bag to prevent sticking.

Frequently Asked Questions
Can I make this without a candy thermometer?
It’s not recommended. The hard crack stage is critical to getting that crisp, glassy texture, and without a thermometer, it’s hard to hit the right moment. If you must go without, drop a bit of the boiling mixture into cold water—it should harden instantly and break like glass when ready.
Can kids help with this recipe?
Kids can help decorate and mix colors, but adult supervision is essential during the cooking and pouring stages. Molten sugar can cause serious burns.
Can I make these vegan or allergen-free?
Yes. All the ingredients listed are naturally vegan. Just be sure to check that your flavorings and colorings are free from animal products or allergens.
What’s the best way to get a true aurora effect?
Use multiple gel colors and swirl them gently with a toothpick just before pouring. Don’t overmix, or the colors will combine into a murky shade.
Final Thoughts
Aurora Candy is one of those recipes that reminds us how beautiful simple ingredients can become with just a little heat and imagination. Whether you’re whipping up a batch for a themed event, surprising someone with a unique handmade gift, or just feeling a little extra creative today, this recipe delivers magic in every bite.
And if you’ve fallen in love with this recipe, don’t stop here. Explore more celestial and colorful creations with these recommended favorites:
Each one pairs beautifully with Aurora Candy for a cosmic culinary experience.
Share the Magic
Did you try this recipe? I would love to hear how it turned out! Leave a review below, and tag your photos with #AuroraCandyMagic on Pinterest or Instagram. Your version might just inspire someone else to get creative in the kitchen.
Nutritional Information (Per Serving – Approx. 1 piece)
- Calories: 60
- Total Carbohydrates: 15g
- Sugars: 12g
- Fat: 0g
- Protein: 0g
- Sodium: 0mg
Values will vary depending on the size of your molds and the exact ingredients used.
Thanks again for joining me here. Keep glowing, keep creating, and above all—keep finding sweetness in the everyday.
Print
Aurora Candy Recipe: Sweet, Shiny, and Glowing Like the Northern Lights!
Description
Make your own glowing, glassy sweets with this easy Aurora Candy recipe! Inspired by the northern lights, these vibrant hard candies shine with color and customizable flavor. Perfect for parties, gifts, or just adding a little magic to your day.
Ingredients
-
1 cup granulated sugar
-
½ cup light corn syrup
-
¼ cup water
-
Food coloring (gel or neon for best results)
-
Flavoring extract (optional – raspberry, lime, mint, etc.)
-
Citric acid or sanding sugar (for coating)
-
Nonstick spray (for molds or trays)
Instructions
-
Lightly spray your candy molds or a parchment-lined tray with nonstick spray and set aside.
-
In a medium saucepan, combine sugar, corn syrup, and water. Stir gently over medium heat until fully dissolved and clear.
-
Stop stirring and attach a candy thermometer. Allow the mixture to boil undisturbed until it reaches 300°F (hard crack stage).
-
Remove from heat and quickly stir in food coloring and flavoring extract. Swirl gently to preserve color separation.
-
Carefully pour the hot mixture into your prepared molds or tray. Let cool completely, about 30–60 minutes.
-
Once hardened, pop candies out and toss in citric acid or sanding sugar for extra sparkle and flavor.
Notes
-
Use gel-based food coloring for bold, vivid hues that mimic the aurora’s glow.
-
Be sure to work quickly once the mixture is off the heat—hot sugar sets fast!
-
Want an extra cosmic look? Dust finished candies with edible glitter or shimmer powder.
-
Store in an airtight container at room temperature for up to 2–3 weeks.
-
Always supervise if making this with kids—molten sugar gets extremely hot.